The Art Of The DIY Audiobook
I was planning on recording this morning.
I’ve been working on the audio version of my novel. The rights for audio were left to me, and since I have experience both talking into a microphone and editing the digital stuff that comes out the other end, I’ve decided to handle the production myself. I had everything I needed to work on it this morning, except silence. Somebody next door is using a hammer and reciprocating saw right outside of my window. So it’s blog time.
In this post, I’m going to go over the things I have at home for recording and editing my own audio. Hopefully, this will at least give you a good example of what you need if the inspiration has hit you to try the same yourself.
What Do You Need To Make Your Own Audiobook?
You should probably start by having a book.
No kidding, right? I just wanted to make this clear in case you are in the midst of some kind of DIY fever dream.
Learn how to speak into a microphone.
“This guy is a jerk!” I’m not trying to be, dear reader. I simply mean that it will pay to have experience recording your own voice. Pre-pandemic, there were more options, and hopefully those chances will increase again soon. Many studios and acting schools have courses on doing voiceovers. I’ve taken a few and have had some coaching, though I am by no means an expert. But I do have experience recording myself and listening to direction. You need to at least get past the point where the sound of your own voice makes you grimace. Because if you’re recording your own audiobook, you’re going to have to listen to your voice a lot.
Have a computer.
Working through hours of an audiobook is not something phones or tablets are quite up to yet. Maybe there are people out there doing it, but I am not one of those people. I have Apple computers, you could have a PC. As long as it has a USB port and is reasonably modern, you should be good.
Get a microphone.
Yes, the trend of the obvious tips continues. But you’re not going to be getting a handheld microphone like some wedding DJ. You’re going to need something made for doing quality voice work.

The Yeti microphone from Blue.
I have a Blue Yeti microphone that has worked well for me for the last few years. It’s a good microphone with options for different recording types, from stereo recording to close voice work. It connects through USB and the sound quality is solid.
You’ll need to accessorize.
It is possible to begin recording with the Blue Yeti or other microphone right out of the box, but a few extra items will elevate your audio.
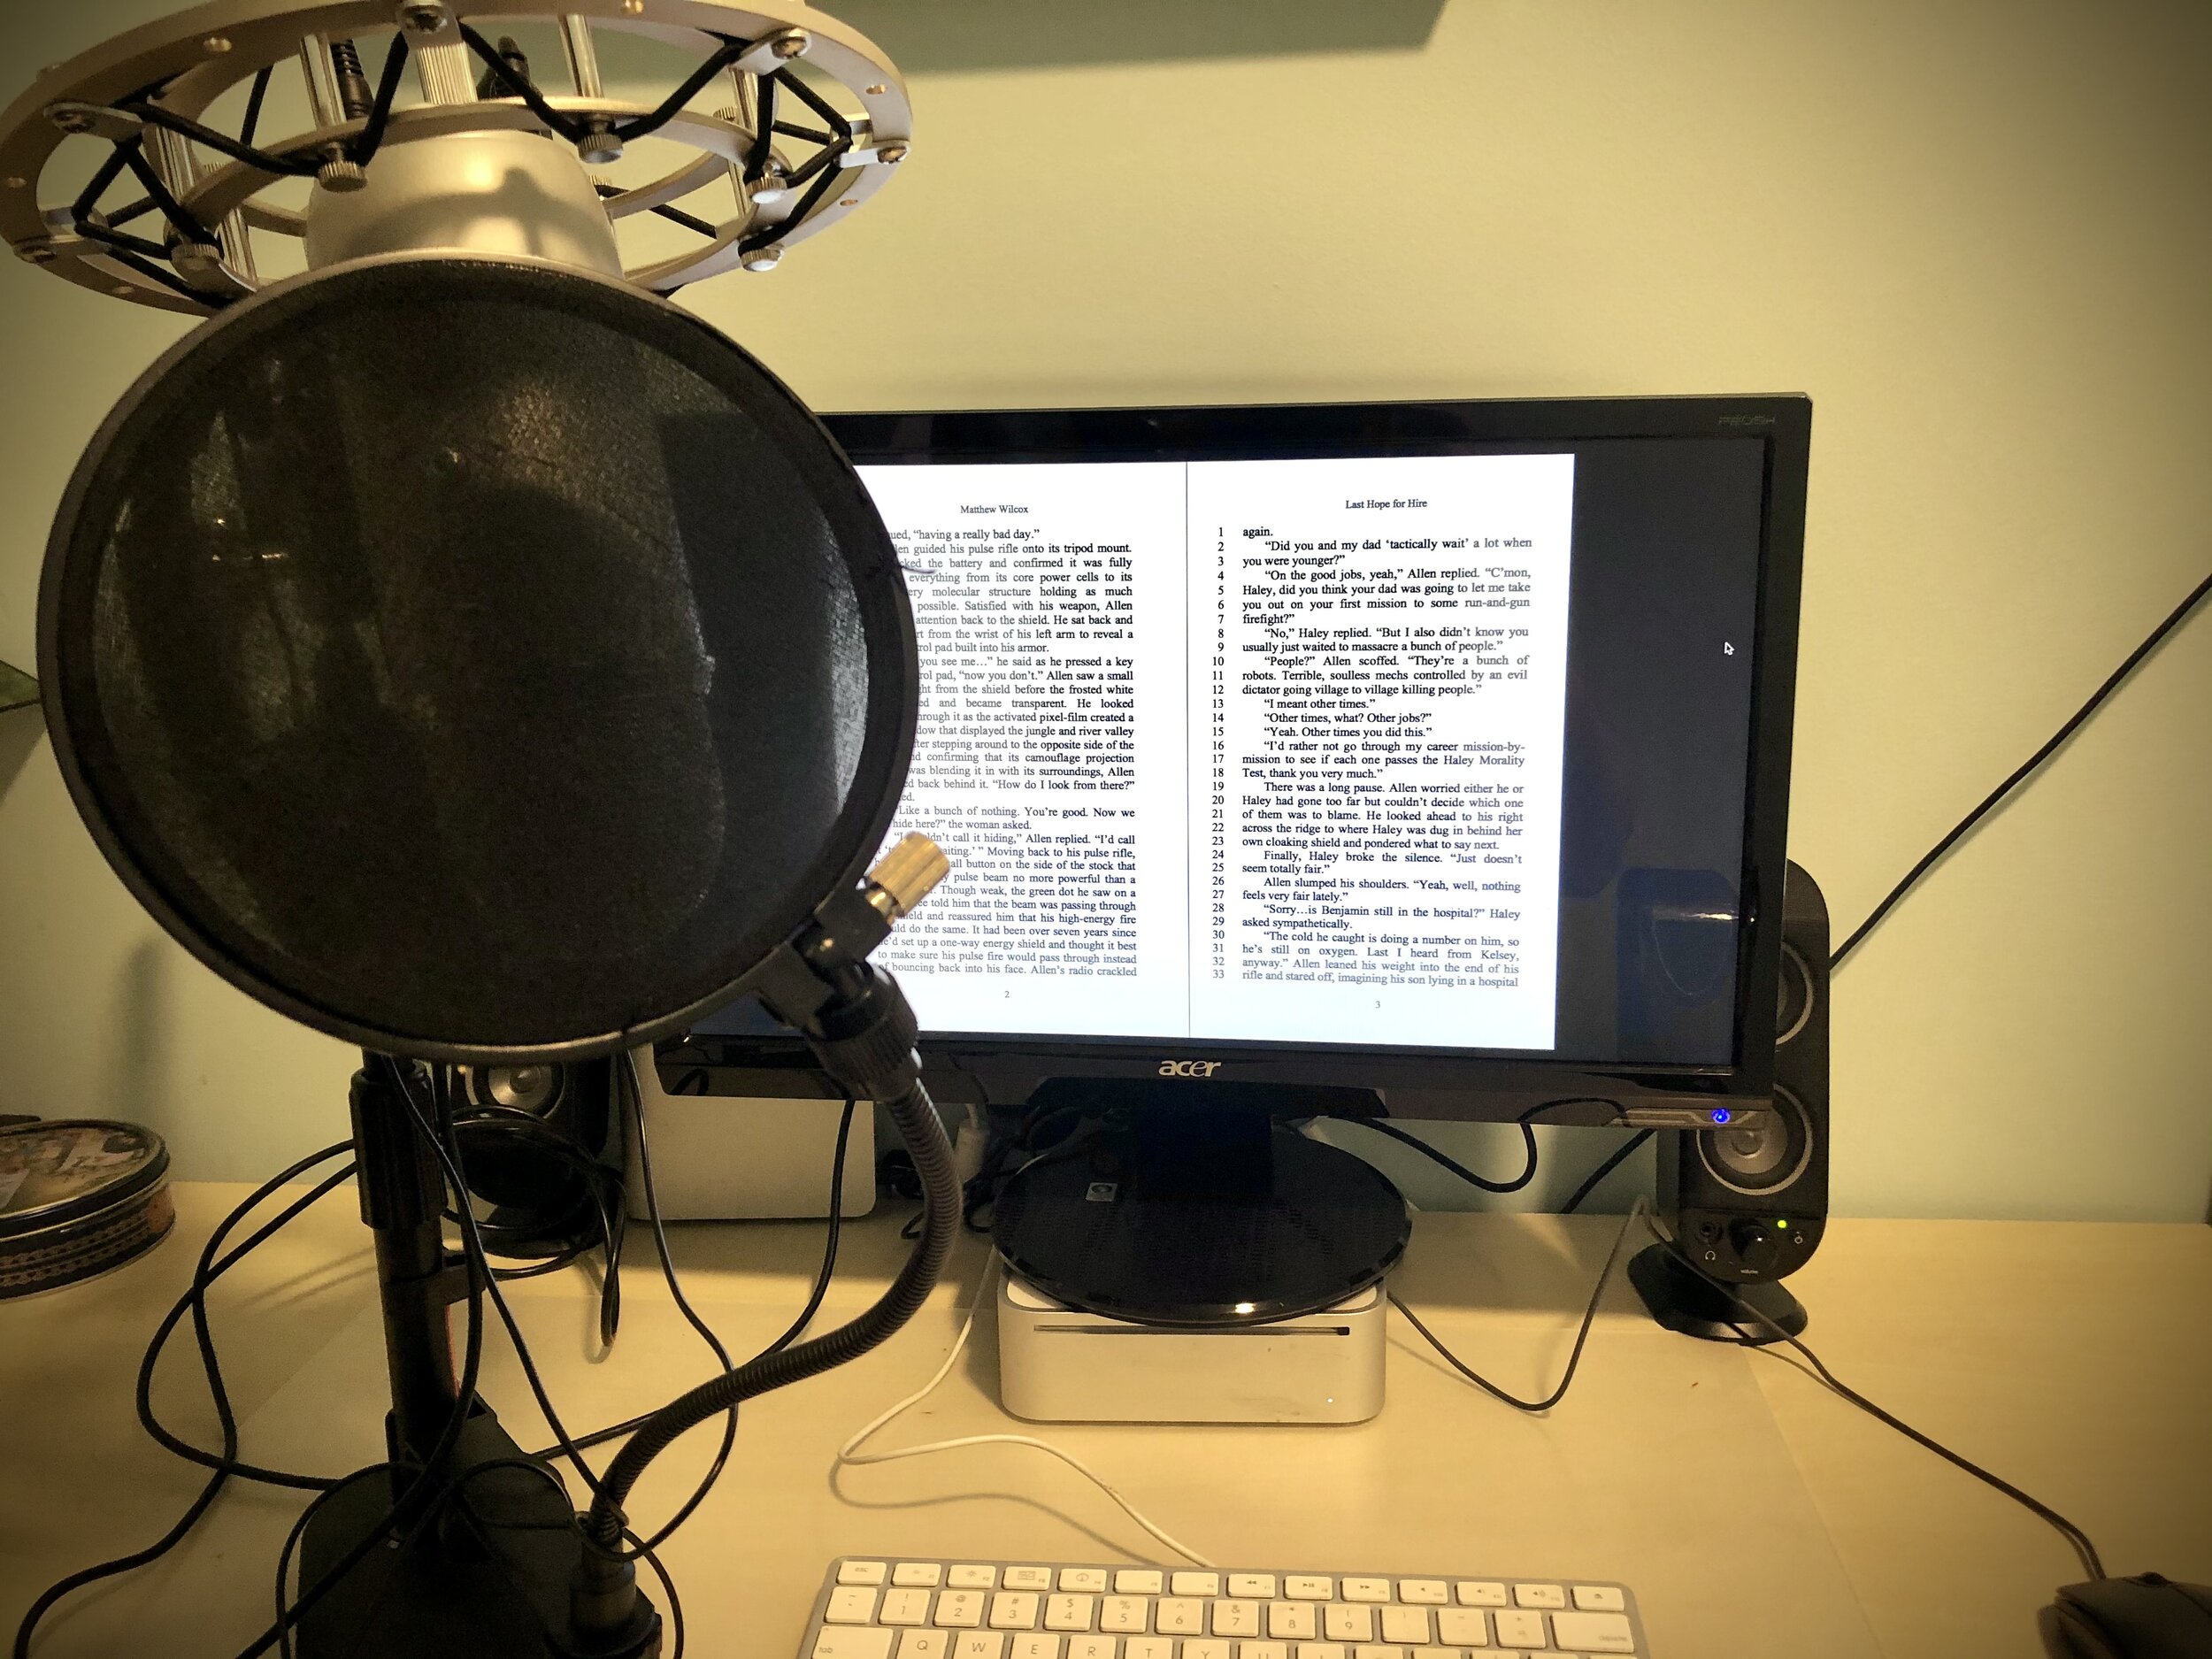
My simple and wire-heavy home setup.
When I ordered my microphone, I got it as part of a kit that included a stand, pop filter, and headphones. You can find kits on Amazon, B&H Photo, and even eBay. The stand helps isolate the microphone from rumbles and vibrations going on in your home, and the pop filter does pretty much what the name implies. These extra items will save you a lot of work later when you have to clean up and edit the audio you record.
Get recording software.
This part is the best because, luckily, there is a free option that has worked very well for me.

Audacity is an open-source recording and editing program.
Since we’re focusing on recording spoken-word, Audacity is a wonderful program to use. It’s open-source and available for download for most operating systems and has the tools that you’ll need to edit and process what you record. This brings me to my next tip.
Learn how to edit and process what you record.
I don’t speak perfectly in the best of circumstances, much less when recording hours of audio. Others are incredible at it, and maybe you will be as well. Either way, once your voice is captured, you’ll still have to work on it.

Raw, unprocessed audio at the top. Filtered, processed, final audio below.
You’ll need to familiarize yourself with whatever program you end up using, and there are some go-to filters you’ll be using a lot and should get a solid handle on above all others.

The Noise Reduction filter
Even if you live in a mountaintop monastery, you’re going to need noise reduction. That is, unless you have invested money into a home studio with soundproofing. I myself have not. Most homes have some kind of tone that may be distracting when your audio is listened to with headphones. You will get a nice, clean sound if you filter out the general rumble around you.

The Compressor filter.
Using the compressor filter is not the same as “compressing” your final file. This filter will take the lower volumes of your speech and the higher volumes and adjust them to be more even across the board. By default, the filter on Audacity will then increase the gain so everything is as loud as it can be without clipping (being so loud that the audio is distorted). The compressor also helps so the listener doesn’t have to keep adjusting the volume of the playback to be able to hear everything equally.

The Normalize filter.
You may find later on that your completed audio is still too quiet all the way through, or that your audiobook distribution provider wants the level to max out at something different than what you set. The normalize filter is best done as a final step when you know exactly what level you want everything to be at.
Find time to practice, practice, practice.
Learning your way around your setup will take time, not to mention learning how to record, edit, and process your audio into something that sounds professional. Once you get your recording skills in a good place, export your audio and listen to it on your phone, in your car, on the best speakers you have, and the worst ones as well. Each way will sound different and probably lead you to make slight changes in how you record and use your filters. Also, if you’re like me, there will be a certain “I sound really weird in that part” factor that will make you re-record more than once. But it’s fun and creative, and there’s no better way to spend your time.